How Trust & Security Works in Gawati
Table of Contents
Introduction
This document focuses on how trust and security works in Gawati, what are the components we use, how they interact with each other, and what are the specific configuration choices we have made in Gawati. We cover aspects governing both authentication and authorization in Gawati.
In Gawati we use a third-party open source server called Key Cloak. KeyCloak uses JWT (JSON Web Tokens) to implement security. For a quick introduction to JWT see Understanding JSON Web Tokens .
Note
To install KeyCloak for Gawati use see the Authentication in Gawati .
Realms, Users, Applications
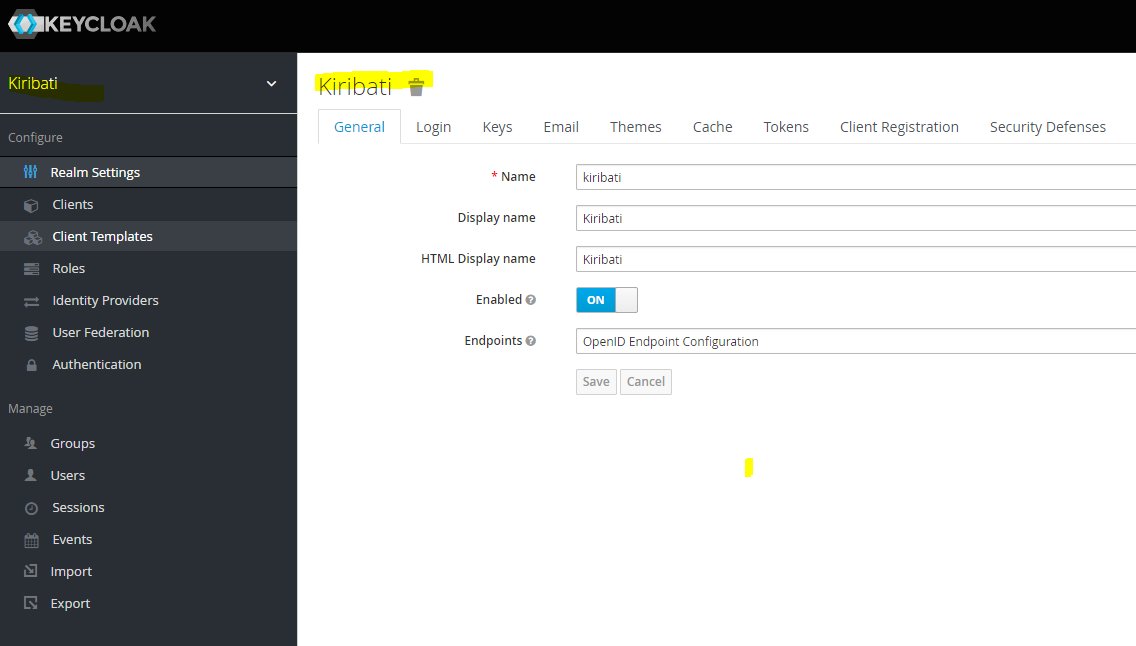
Users in KeyCloak are defined within authentication realms. Applications wanting to authenticate with a Realm, need to be registered and configured on the Realm, a registered Application in KeyCloak is called a Client. Applications can define specific roles which can be assigned to users on the Realm. In the image below we have added a realm called kiribati which will hold all the registered users.
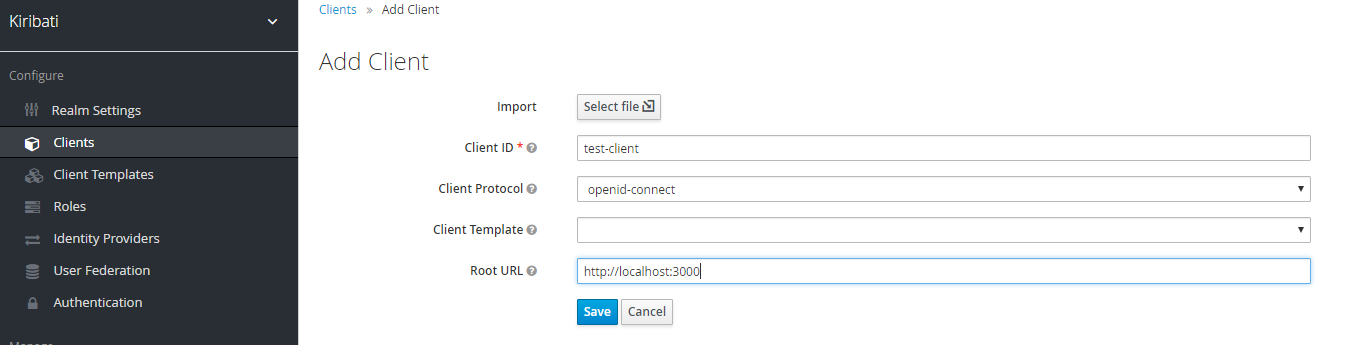
Client applications wishing to connect need to register, by Add Client, see image below, where we add a test-client. The root url is the URL of the application authenticating with the KeyCloak instance.
The test-client can be edited. For use in Gawati we need to change some defaults. Most importantly, we need to change the default Access Type from public to confidential. We do this because, the public method does not provide access to authentication tokens; confidential also requires passing a secret to KeyCloak when initiating any kind of request, and is more secure; finally, in confidential mode, tokens can be introspected on the server side (this is possible when Service Accounts Enabled is switched on).
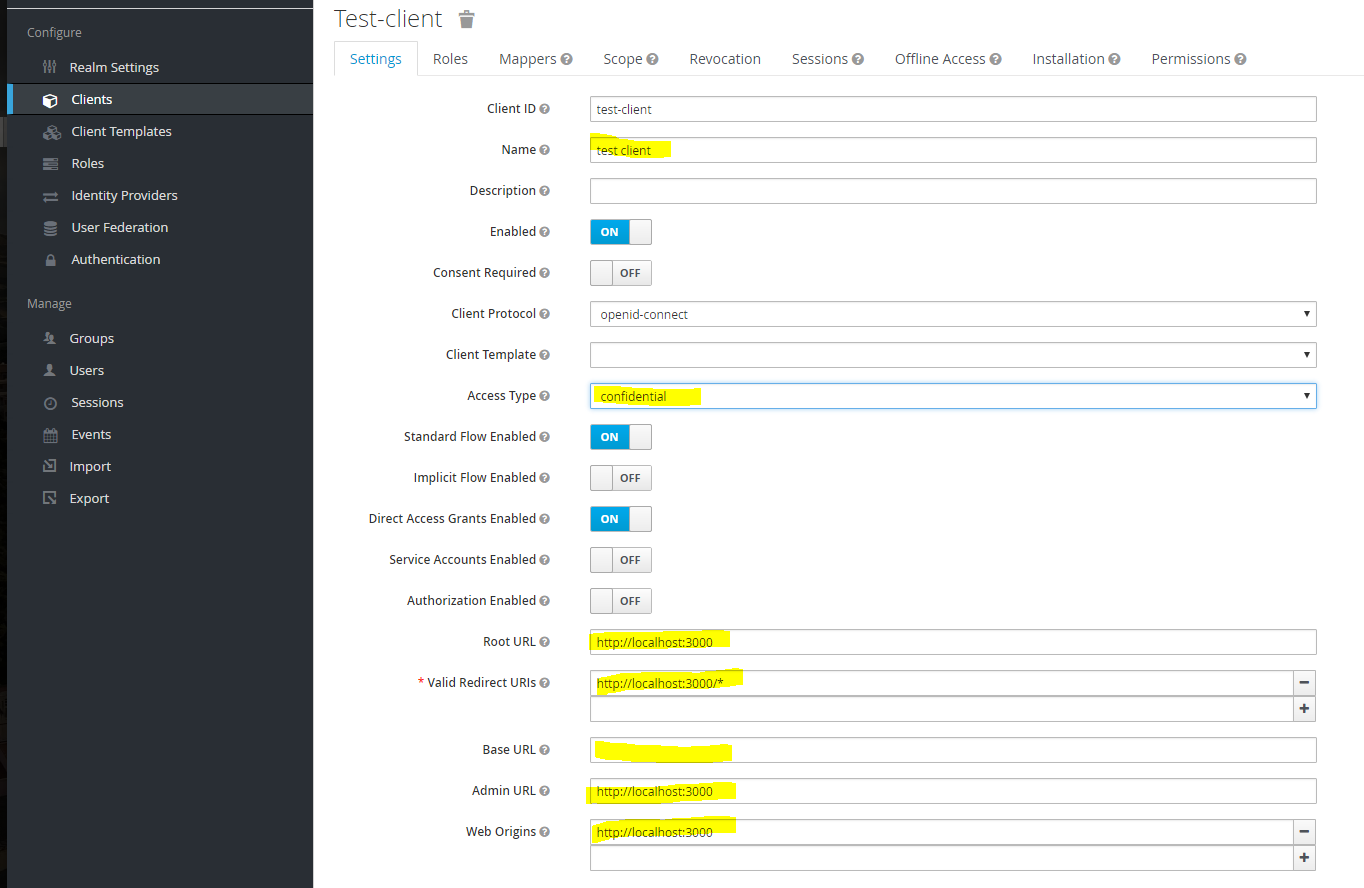
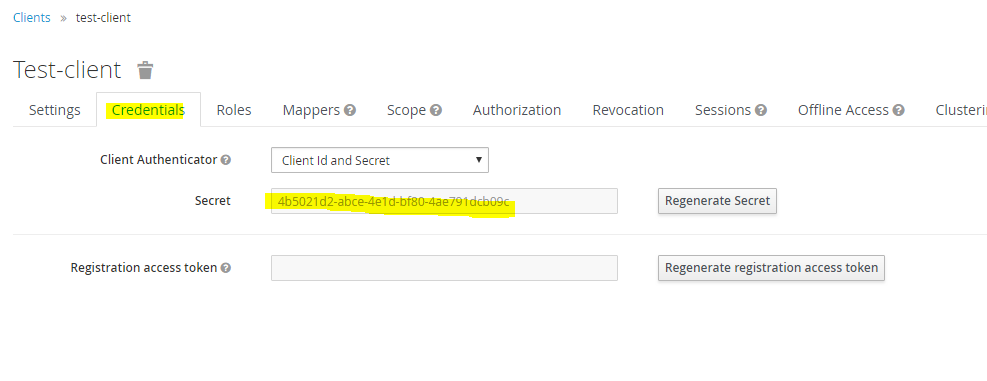
Enable Service Accounts, Authorization and Direct Access Grants. For application use you may also set Direct Access Grants to off, but some admin tools may not work with the client. Set the rest of the URL parameters as per your application. When Access Type is changed to confidential, a new credentials tab is added which has the secret which has to be passed by clients making requests to KeyCloak.
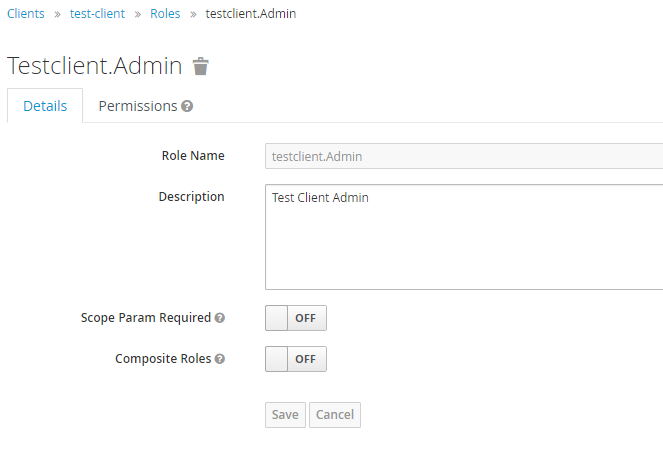
We can create roles specific to the client, in the Roles tab. Roles for a client can also be given a realm wide scope if needed so other clients in the realm can use them.
The installation tab allows you to export the client configuration and use it within your application to integrate with KeyCloak. This configuration will be used in both client applications, and also in server applications (where it will be used in service accounts mode).
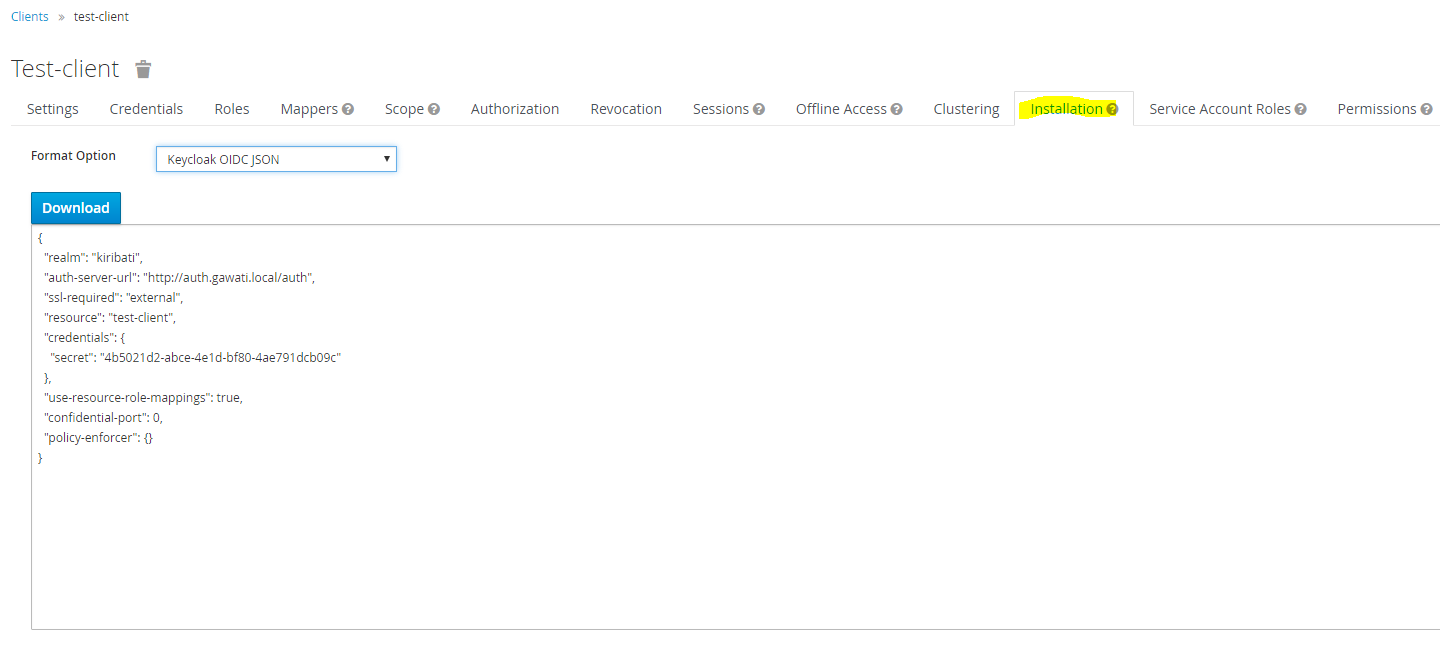
We export the configuration in Keycloak OIDC JSON format.
Login & Authentication
Login is initiated by the Application by initializing itself with the KeyCloak JSON file shown above, and then initating a call to Login. This redirects the browset to KeyCloak where login is securely done, and then the user is redirected back to the calling application. At this point an authentication access_token is available to the client application. The raw response decoded looks like this:
1 2 3 4 5 6 7 8 9 | {
"access_token": "eyJhbGciOiJSUzI1NiIsInR5cCIgOiAiSldUIiwia2lkIiA6ICJ5dVZmQUxKaF9TanFmdklhcnRtRnlSMFZ5OUlMNnNxRF9TREVaMEk5cFpzIn0.eyJqdGkiOiI1NjU2NmFiZS03ODFiLTQ0NjktYWU2MS0yYTBhMjhhYzYwMjYiLCJleHAiOjE1MjE5MTU0MzksIm5iZiI6MCwiaWF0IjoxNTIxOTE1Mzc5LCJpc3MiOiJodHRwOi8vYXV0aC5nYXdhdGkubG9jYWwvYXV0aC9yZWFsbXMvbWFzdGVyIiwiYXVkIjoiYWRtaW4tY2xpIiwic3ViIjoiYjk5YTFjMTAtMDI2Yi00NGJmLTk4ZDEtYzA2NGQyNjA2OGY4IiwidHlwIjoiQmVhcmVyIiwiYXpwIjoiYWRtaW4tY2xpIiwiYXV0aF90aW1lIjowLCJzZXNzaW9uX3N0YXRlIjoiNjk5ZTk1M2YtMTVlMy00ZGRjLWJkNWUtZjM4Y2E0MGYwY2U5IiwiYWNyIjoiMSIsImFsbG93ZWQtb3JpZ2lucyI6W10sInJlc291cmNlX2FjY2VzcyI6e30sInByZWZlcnJlZF91c2VybmFtZSI6ImFkbWluIn0.YFNzt_hJaS6eHQe39Qi0Wgqm7kzo2ZUTIuS8XzCL6ohvOnxAMFm-55PTZejjZN6jwrlrdqnc8uxfmvD7Lxy1xuIzyADEFcwXaAXXw4Xc5TMcx-ZWoS7Y8CFjn5QQxIDNbYnBcMiO-DJkrKRjeRTfK27n7ialiMD3-t26fOQiAe0nPY6lLIwfSl31LKSpT23DQsnouFbXYj9FrfUTacQZiku6mTXuEkxDlSwDiQlA_Sk4w2jo2qGtw7wD_qKOun9Jpbrrucm5VRGGluuKzOGnUWV8d2njBOA_-JFxhZOZpRfqzqHj-FqZvTM1FqU57jqwNQAw3FhEYInXxealGh92vg",
"expires_in": 60,
"refresh_expires_in": 1800,
"refresh_token": "eyJhbGciOiJSUzI1NiIsInR5cCIgOiAiSldUIiwia2lkIiA6ICJ5dVZmQUxKaF9TanFmdklhcnRtRnlSMFZ5OUlMNnNxRF9TREVaMEk5cFpzIn0.eyJqdGkiOiJhYTRhZjU0Mi1iZjI2LTQ5MWEtYjcxNi1hZjA5YzYzN2U4ZGMiLCJleHAiOjE1MjE5MTcxNzksIm5iZiI6MCwiaWF0IjoxNTIxOTE1Mzc5LCJpc3MiOiJodHRwOi8vYXV0aC5nYXdhdGkubG9jYWwvYXV0aC9yZWFsbXMvbWFzdGVyIiwiYXVkIjoiYWRtaW4tY2xpIiwic3ViIjoiYjk5YTFjMTAtMDI2Yi00NGJmLTk4ZDEtYzA2NGQyNjA2OGY4IiwidHlwIjoiUmVmcmVzaCIsImF6cCI6ImFkbWluLWNsaSIsImF1dGhfdGltZSI6MCwic2Vzc2lvbl9zdGF0ZSI6IjY5OWU5NTNmLTE1ZTMtNGRkYy1iZDVlLWYzOGNhNDBmMGNlOSIsInJlc291cmNlX2FjY2VzcyI6e319.l89VECnHrpQ70SnZ711dQ92mVpNhqpX_KGOWcRQxykODv9cVbfckMAbQ3JIsvkq7GazuJuUh3VL-f2ib7dwPoFsIBNGcQXwdG8Wn-EjIvKDAAZZ0xjIBGJjRr5P24u_U3JPTWM1rWT3XAyQGDk4PLPJlI5RUVJRPN8Gly9fOKbPbD3dwAB6grKBdy9jW3mbAtF6bCEzlzByuK3n17kj5jGzlxsZt21DebPHeVZey3_8r1Mo4Gy2Zutt_Oq7M75cOEtMDBBmsBBrEELBJ0K5tz47L8IspQ_e92bh-ZSkxRJzdj2Sy1CLnhB5CI3z2ifpl0rjLp6RFucjc8HJCAEI-FA",
"token_type": "bearer",
"not-before-policy": 0,
"session_state": "699e953f-15e3-4ddc-bd5e-f38ca40f0ce9"
}
|
The access_token has only a short life-span, and needs to be periodically updated by the Application, by making a refresh token API call to KeyCloak, to indicate that the user is still active. The access_token contains all the information associated with the Application, that we had configured on the KeyCloak client earlier. The client can make authenticated and unauthenticated API calls to a server side API, but for authenticated Server Side apis, the access_token is passed, and validated at the server end. Validation happens at the server end, by passing the token back to the KeyCloak server, to an introspecting API, which returns a status of active = false if the token is invalidated, or if it is valid returns the full decoded content of the token:
1 2 3 4 5 6 7 8 9 10 11 12 13 14 15 16 17 18 19 20 21 22 23 24 25 26 27 28 29 30 31 32 33 34 35 36 37 38 39 40 41 42 43 44 45 46 47 48 49 50 51 | {
"jti": "0a9c614a-1120-438b-8aa3-db69792df89a",
"exp": 1522085986,
"nbf": 0,
"iat": 1522085686,
"iss": "http://auth.gawati.local/auth/realms/kiribati",
"aud": "test-client",
"sub": "fa3dceab-dd19-4bd2-9f2a-e4aeb9557bfe",
"typ": "Bearer",
"azp": "test-client",
"nonce": "d0de0910-4184-4497-8510-73294ff03cbb",
"auth_time": 1522085418,
"session_state": "a448a83c-79c1-49eb-bc86-d6b672a6973f",
"name": "test kumar",
"given_name": "test",
"family_name": "kumar",
"preferred_username": "test",
"email": "test@blah.in",
"acr": "0",
"allowed-origins": [
"http://localhost:3000"
],
"realm_access": {
"roles": [
"uma_authorization"
]
},
"resource_access": {
"test-client": {
"roles": [
"test-client.Admin"
]
},
"gawati-client": {
"roles": [
"client.Editor",
"client.Admin"
]
},
"account": {
"roles": [
"manage-account",
"manage-account-links",
"view-profile"
]
}
},
"client_id": "test-client",
"username": "test",
"active": true
}
|
The decoded information(for e.g. the roles) can be used by the server API to apply it to business logic - for instance, filter queried data based on the role of the user, and send it back to the client in the API response. Effectively there is an overhead of querying KeyCloak to instrospect the token for every request made to the the server.
Note
There is an alternative approach which avoids the overhead of the request, by making use of signed JWT, where the signature passed by the client is validated by the server API using standard JWT libraries, without querying KeyCloak. We have not implemented this in Gawati yet.